OpenSSL Self-Signed CA
Setting up a basic CA for development certificate issuance via OpenSSL is fairly simple, but most of the tutorials available online don’t show every step. This guide attempts to be as clear as possible, but if you spot anything that could use more explanation don’t hesitate to leave a comment.
If you don’t have a copy of OpenSSL on your machine, download it now. Linux and OS X users should already have it on their systems, but Windows users can get the latest binaries here. Please note that if you are running a version of OpenSSL prior to 0.9.8 that signing the same CSR multiple times will cause an error (due to lack of support for unique_subject=no). RHEL4 ships with 0.9.7a.
Creating a Self-Signed Root Certificate
First we must create a signing cert (a certificate with basicConstraints set to CA:True) for use. This will write out a privkey.pem file (base64 encoded RSA private key) as well as a root.cer file containing the self-signed public key with a 3650 day validity period.
openssl req -newkey rsa:2048 -days 3650 -x509 -nodes -out root.cer
You will see output in the following form. Fill in the fields as you desire. Example choices are filled in below.
Generating a 2048 bit RSA private key
............................................+++
.................................................+++
writing new private key to 'privkey.pem'

----
You are about to be asked to enter information that will be incorporated
into your certificate request.
What you are about to enter is what is called a Distinguished Name or a DN.
There are quite a few fields but you can leave some blank
For some fields there will be a default value,
If you enter '.', the field will be left blank.

----
Country Name (2 letter code) [GB]:US
State or Province Name (full name) [Berkshire]:Illinois
Locality Name (eg, city) [Newbury]:Chicago
Organization Name (eg, company) [My Company Ltd]:My Company
Organizational Unit Name (eg, section) []:
Common Name (eg, your name or your server's hostname) []:My Development CA
Email Address []:
Setting Up a Custom Openssl.conf
Create a new file named “myca.conf” save the following configuration into it substituting the proper private key, certificate (public key), and new_certs_dir (random temp dir) paths. On Windows if you choose to use backslash delimited paths, please note that you will need to escape the backslashes with an additional backslash (e.g. C:\path\to\cert becomes C:\path\to\cert).
[ ca ]
default_ca = myca

[ crl_ext ]
# issuerAltName=issuer:copy  #this would copy the issuer name to altname
authorityKeyIdentifier=keyid:always

[ myca ]
new_certs_dir = /tmp
unique_subject = no
certificate = /path/to/root.cer
database = /path/to/certindex
private_key = /path/to/privkey.pem
serial = /path/to/serialfile
default_days = 365
default_md = sha1
policy = myca_policy
x509_extensions = myca_extensions

[ myca_policy ]
commonName = supplied
stateOrProvinceName = supplied
countryName = supplied
emailAddress = optional
organizationName = supplied
organizationalUnitName = optional

[ myca_extensions ]
basicConstraints = CA:false
subjectKeyIdentifier = hash
authorityKeyIdentifier = keyid:always
keyUsage = digitalSignature,keyEncipherment
extendedKeyUsage = serverAuth
crlDistributionPoints = URI:http://path.to.crl/myca.crl
You will also need to create empty files located at /path/to/certindex and /path/to/serialfile. For the serialfile add “000a” (without the quotes) as a hexadecimal seed for the serial number.
Create a CSR and Issue A Cert
We now have our CA infrastructure configured so let’s create a CSR (certificate signing request) and issue our first certificate.
openssl req -newkey rsa:1024 -nodes -out ourdomain.csr -keyout ourdomain.key
This will write out a req.key and req.csr after you choose the fields you desire. If you are setting up a serverAuth certificate the common name should be the FQDN of your server. You can also leave the challenge password blank.
Generating a 1024 bit RSA private key
..........++++++
..................++++++
writing new private key to 'req.key'
-----
You are about to be asked to enter information that will be incorporated
into your certificate request.
What you are about to enter is what is called a Distinguished Name or a DN.
There are quite a few fields but you can leave some blank
For some fields there will be a default value,
If you enter '.', the field will be left blank.
-----
Country Name (2 letter code) [GB]:US
State or Province Name (full name) [Berkshire]:Illinois
Locality Name (eg, city) [Newbury]:Chicago
Organization Name (eg, company) [My Company Ltd]:End Entity, Inc.
Organizational Unit Name (eg, section) []:
Common Name (eg, your name or your server's hostname) []:www.examplefqdn.com
Email Address []:

Please enter the following 'extra' attributes
to be sent with your certificate request
A challenge password []:
An optional company name []:
Now we’re ready to issue the certificate! We will let our configuration file do most of the heavy lifting. Just specify the path to the config and the path for the output certificate.
openssl ca -batch -config /path/to/myca.conf -notext -in req.csr -out /path/to/ourdomain.cer
Your certificate should now be written to the path you specified. To verify the contents of the certificate:
openssl x509 -noout -text -in /path/to/ourdomain.cer
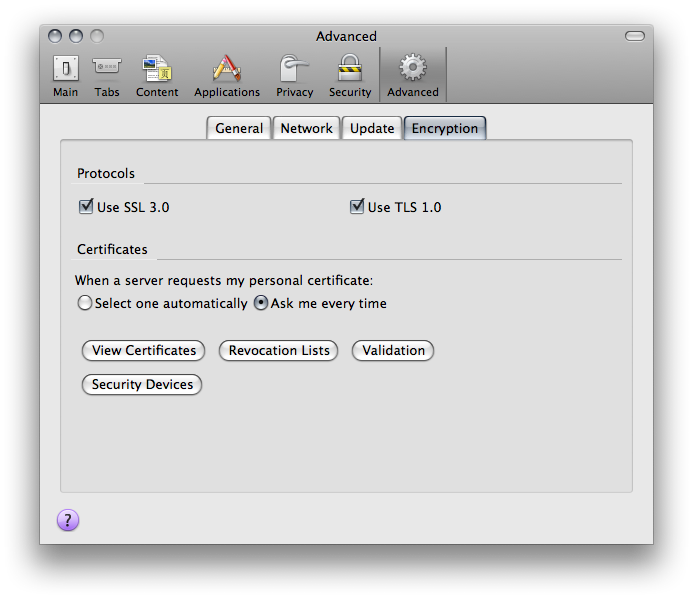
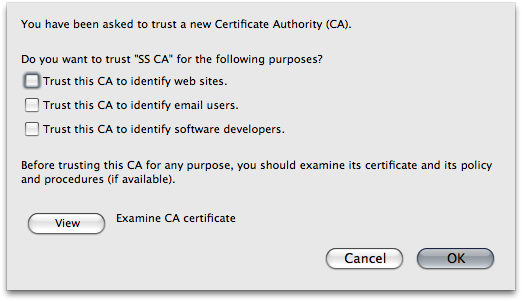
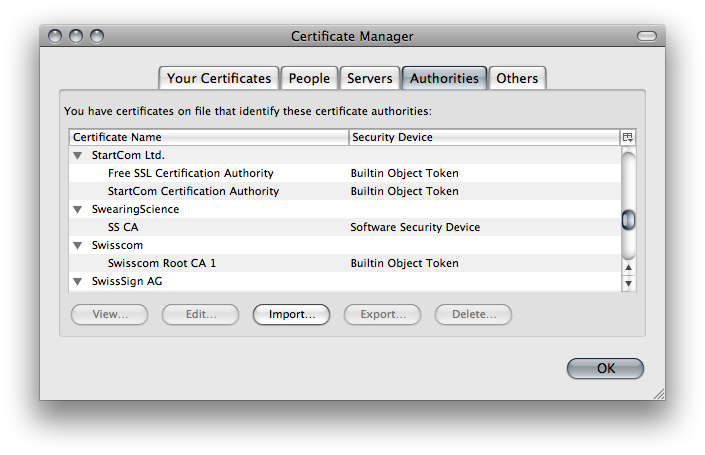
Browser Trust Configuration
To be trusted a certificate must have a root at the top of its chain inside the certificate store of whatever client you are attempting to use. This means you will need to import your self-signed public key (root.cer) into the store. While each browser/OS is different, let’s demonstrate via Firefox 3.